Beet Greens, Herbs and Butter Lettuce Salad

The Table Was Set…

IMG_1533

The Harvest Prepped…

IMG_1520

IMG_1521

And An Herbed Beet Greens And Butter Lettuce Salad Was Born!

IMG_1523

If you’re getting a CSA or shopping the farmer’s markets, look for healthy and perky leaves on your beets for a double whammy as beet greens make fabulous salad. They have a wonderful, rich, mellow flavor, and their tender leaf makes for a nice crisp salad chew! I chopped the greens and thinly sliced one beet for a quick salad, but should experiment with the tearing method as the greens may have a better aesthetic that way.

Aesthetics aside, the flavors in this salad were quite complex and enjoyable. One of my weekend menus called for Farm Fresh Spring Rolls that were to include rice noodles, beet greens, butter lettuce, mint, basil, fennel and dill, but I ran into a bit of a materials snafu and had to alter the course. Before I discovered my missing ingredient (forgotten spring roll wraps), I made a spicy sesame ginger dressing which ended up topping the beet greens and spring roll herbs in a wonderful accident. Toasted sesame oil pairs well with the buttery nature of beet greens and the ginger-garlic-spice made for an interesting and delicious surprise flavor.

Here’s an approximate recipe for the dressing. You will want to taste and adjust especially the soy sauce. I don’t like the dressing too salty, so find that I add the aminos slowly.

Spicy Sesame Ginger Garlic Dressing:

  • 1 cup toasted sesame oil
  • 1/4 cup rice vinegar
  • 1 Tbs. Braggs Liquid Aminos
  • 2 Tbs. honey
  • 1 clove garlic, minced
  • 1 inch piece ginger, minced
  • 1/2 tsp. dried chile flakes

This salad was followed by a simple collard stir fry with ginger and garlic,  spicy tofu and jasmine rice.

After All Was Said And Done…

IMG_1531


Feeling-Sorry-for-the-Radish Pickle

Radish Pickles

IMG_1430

I really never thought I’d like radishes that much let alone develop enough empathy to actually feel sorry for them. I tend towards narcissism when it comes to the spicy little nuggets – I could care less if they come or go.  Today however, between raindrops in the garden, I saw little rosy butts literally jumping out of their snug beds with cracking skins exposing a crisp white chasm of flesh. Oh! It was so sad. I realized this travesty was a direct result of too much water. The spicy buggers were water-logged! I couldn’t help but imagine how they must feel – so fat and tight in their pants! Really, it was quite a shock! I first noticed this odd behavior after Saturday’s storm with five inches of rain. In fact, some were literally toppled over in the garden as if clawing their way out of a freshly dug grave. They were nearly able to escaped the deluge. I thought perhaps the lighting caused this unique experience, but it was today when their skins started to pop that I realized they were just too full to take any more.

So, I saved them and turned them into pickles! I never made radish pickles before (well, actually, I made some yesterday, too, so I knew I would like them – delicious!) so I wasn’t sure how I would like them prepped – sliced, wedged or whole. I decided to make all three. How do you prefer your radish pickle?

I’m not leaving the recipe here, but you can ask Mr. Google if you don’t know how to can, and the brine recipe can be found here.

Learning to Love Radish Salad


Radish Salad with Curry Vinaigrette

IMG_1415

Let the truth be told…radishes have often found their way into my compost bin! Of course, that was a long, long, long time ago when I didn’t know better! Now that I understand how much work goes into vegetable gardening, I wouldn’t dream of gifting them to the kitchen gods quite so often. Even so, I can only eat so much radish. I like them. I like them a lot, but one or two a year seems to be quite enough for me! Well, after they exploded from the garden the other day, I realized I would soon have quite a number of radishes having dutifully companion planted them with my beans and carrots. Not only would the challenge be to create a highly palatable radish dish, but hopefully use the greens as well.

IMG_1405The last few years I have been making quite a lot of fermented veg, so of course, using the radishes in that manner was the first thing that came to mind, but I am the only one in the house who will eat them. Thinking about the fermenting process reminded me of making kimchi – specifically of grating the veg and soaking it in salt water. This is a great trick for removing the “bglahh” from some of our more bitter friends!

I also pondered a dressing that would highlight the earthy nature of the green knowing that those, too, must be included in the salad. It also occurred to me that a long time ago I used to make dressings with dijon mustard, but have forgone that option for my simple oil, vinegar and honey concoctions as of late. And so, this salad was born!

I grated the radish with a bit of carrot, salted the mix for about an hour. Then I rinsed it and squeezed out the excess water. This was added to the finely chopped radish greens, tossed in the dijon curry vinaigrette and topped with toasted almonds. It is quite delicious if I might say so myself!

The next week… I made the version below with white icicle radishes, massaged collard greens, a few leftover red peppers, the same curry dressing and a sprinkling of mustard flowers.

IMG_1473

Salad Ingredients:

  • 1 bunch fresh radishes, grated
  • 2 carrots, peeled and grated
  • radish leaves, finely chopped
  • toasted almond slivers
  • kosher salt to sprinkle

Curry Vinaigrette Ingredients:

  • 1/2 cup olive oil
  • 4 Tbs. rice wine, apple cider or red wine vinegar
  • 1 Tbs. honey
  • 2 tsp. dijon mustard
  • 2 tsp. Bragg’s Liquid Aminos or soy sauce
  • 1/2 tsp. curry powder
  • fresh ground black pepper

Directions:

  1. Grate radishes and carrots. Sprinkle the grated veggies with kosher salt, mix together and let sit for an hour.
  2. Finely chop the radish leaves, cover and refrigerate.
  3. Mix all ingredients for vinaigrette. Taste and adjust as needed – some like more salt, more vinegar, more oil, more sweet.
  4. Once the salt has pulled much of the water from the veggies, rinse under cold water in a colander then squeeze extra water out.
  5. Toss greens, grated veggies and vinaigrette. Top with almonds right before serving. This salad can marinate in the fridge for a few hours before serving.

Sesame Slaw with Golden Beets and Kale

The only way to get my son to run errands with me is to bribe him. As you can imagine, this can sometimes be costly and frustrating! But getting him to the coop is easy and free…all I need to do is remind him of the samples! He usually lingers by my side in the fresh foods area picking out bananas and other fruits, but as soon as we turn the corner, he beelines to the deli for samples of cheese, spreads, crackers and salads. The other day he came running up to me with a little cup filled with some sort of a kale salad.

“Here Mom, this is for you. I thought you’d like it. It has kale.”

“What is it?”

“It’s a kale and golden beet salad from the deli.”

“Did you try it?” I asked incredulously thinking the coop had cast some sort of spell over the boy who hates vegetables.

“Of course not! It has kale. I got it for you.”

What a sweet boy and what a sweet salad. I knew from the first taste, something like it would need to come out of my kitchen. The coop salad had the same general flavor devised with sesame oil, sesame seeds and ginger that my recipe includes, but did not have raisins. Somehow a little sweet seems like a good pairing for the beets and carrots. I think some fresh fruit like chopped nectarines, mangoes or apples would also cut the bill. (What does that mean, anyway?)

Ingredients:

  • 3 large carrots grated
  • 1 large golden beet, peeled and grated
  • 1 bunch curly kale, finely chopped
  • 1 clove garlic, minced
  • 1 jalapeno, minced
  • 1-inch piece fresh ginger, minced
  • 1 cup raisins
  • 1/4 cup sesame seeds, toasted
  • 1 tsp. salt
  • 1/4 tsp. ground black pepper
  • 2 Tbs. sesame oil
  • 2 Tbs. olive oil
  • a few splashes of rice vinegar (2-3 Tbs.)

Directions:

Long grate the carrots by cutting them just the length of the food processor feed tube. Empty into mixing bowl. Next grate the beets the same as the carrots. I chose to quickly saute the golden beets in about a tablespoon of sesame oil as they were a titch bitter when raw. Leave them a little crunchy to the bite.

Mince the garlic, jalapeno and ginger in a food processor and add to carrots and beets in mixing bowl.

Remove the stems from the kale and chop the greens into fine pieces. The kale can be massaged to soften, steamed or sauted.

Mix all ingredients together in a mixing bowl and season to taste. Serve at chilled or at room temperature.

Green Pizza Toppings

Not your average pizza topping is it? But, it’s become my signature. Every week our pizzas sport a concoction of caramelized onion, olive oil, greens and garlic. I figure, there’s just not enough green in the world, so any chance to pair it in an uncommon way, and I will. We also serve a simple field green salad to top every pizza! This slightly sweet vinaigrette pairs wonderfully with the rich savory flavors of cheese, crust and sauce.

The pizza below is host to many local Minnesota veggies straight from the CSA box: turnips and their greens, broccoli, red onion, garlic, and brussel sprouts.

Caramelized Onion and Greens

  • 1 large onion, thinly sliced
  • 2 Tbs. olive oil
  • 2 cloves garlic
  • 1 large bunch of greens (here are some ideas: swiss chard, kale, turnip, mustard…)
  • brussel sprouts and broccoli (optional)
  • salt and pepper

Directions: To caramelize onions I place them in a saute pan on high heat until they begin to brown. Then I turn the heat down and allow them to slowly cook for about twenty minutes stirring every now and then. Add salt and pepper and garlic until fragrant, then add the greens. Saute until the greens are tender and bright green. Careful not to overcook as they will cook more on the pizza.

If you choose to add the brussel sprouts, cut them in half and cook them with the onions so they get nice and browned. Other greens can be added at the end of the cooking time. Of course, Kale needs a few minutes more than tender greens.

That fire swooping up over the top just amazes me!

Llapingachos – Cheese Stuffed Potato Patties

Potatoes? I have a love hate relationship with potatoes. They are starch, carbohydrate, heavy, and can be dry. They are time-consuming to cook and often need so much added “stuff” to make them palatable. Jeff loves potatoes – especially french fries, but it’s not really the potato he loves – they’re just a “vehicle for ketchup!” They are delicious though, aren’t they? Especially roasted with garlic and lots of salt. I loved them in the Vindaloo Roasted Potatoes and Cauliflower dish I made a few weeks ago, and I am always happy to toss a couple of diced potatoes into any winter stew.

If you get a CSA or shop the farmer’s markets, you know fresh potatoes are rolling in from the fields daily right now. They are dense, creamy and still full of water as the starches haven’t had time to convert to sugars yet. They cook more quickly when they are fresh, and in my opinion, taste better in this state.

When I was in college I had an internship in Ecuador, where in the highlands, folks enjoy a cheese stuffed fried potato patty called a “Llapingacho (ya ping gacho). This dish stands out as having a lovely yellow color, a rich flavor, and creamy texture that is nearly impossible to recreate in the United States if you shop at conventional grocery stores. Why is this so? Well, I learned through trial and error, that the Llapingacho will not cooperate with a potato whose starches are overly developed. It simply will not. It can be made, but the texture and flavor never match that of those served in the Andes. Unfortunately, potatoes in the U.S. spend lots of time in storage which allows water to evaporate and starches to form.

Since returning from my internship in 1991 I have tried to recreate the smooth and creamy texture of the Ecuadorian Llapingacho but was not successful until I used the Yukon Golds from my Wisconsin CSA! Fresh from the field they had the perfect consistency and flavor needed to recreate this dish. I assume the potatoes had been dug from the field a day or two before delivery so spent little or no time in cold storage. I don’t think most of us can find potatoes fresh enough in most grocery stores to make the Llapingacho. Even the Yukon Golds that I have tried from the co-op haven’t worked. In addition to needing a completely fresh potato, there are other tricks to making a perfect Llapingacho: 1) wash the starch off the potato cubes before you cook them, 2) let the patties cool completely before frying, and 3) make sure your cooking oil is really hot. This is a great recipe to prep one day and cook the next.

Of course, even fried this potato is still a vehicle for other goodies. In South America the Llapingacho is served with a peanut sauce. Many enjoy a zesty salsa to top, or a grated cabbage coleslaw. We ate ours with a side of yesterday’s Zucchini Salad, chopped fresh jalapenos, cilantro and a squeeze of lime. Delicious!

Take advantage of the fresh Yukons coming out of the fields to make this dish that can only be fully realized in Minnesota right NOW! You’ll love it!

Ingredients:

  • 2 pounds Yukon Golds, peeled and diced into 1-inch cubes
  • 1 cup leeks, thinly sliced (any kind of onion may be used)
  • olive oil to saute leeks
  • salt and pepper to taste
  • peanut or canola oil to fry patties
  • 1 cup grated cheddar or mozzarella cheese

Directions:

Start a large pot of water to boil while you peel and cube the potatoes. After they are diced, swish them around in a big bowl of water to wash off some of the starch.

Once the water begins to boil, spoon the potatoes into the pot and cook them until they are just tender. Drain the potatoes from the cooking water and allow them to cool before mashing.

While the potatoes cool, saute leeks on low heat until they begin to caramelize. Mash the potatoes, mix in the leeks and add salt and pepper to taste. Allow the mixture to cool completely until it can be handled.

Form the mashed potatoes into a ball a little smaller than a tennis ball. Press your thumb into the center of it forming a small indentation. Fill this with cheese then close the potato mixture around the cheese to form a ball again. Press the ball into a patty making sure that the patty is about 3/4 of an inch thick. Place them on a baking sheet lined with parchment paper and cool in the fridge for at least an hour. (I covered mine with wax paper and fried them the next day.)

Heat peanut or canola oil on a skillet until it is very hot. Fry the patties until they are browned on both sides. If your patties are not completely chilled or thick enough, they will be very delicate for flipping.

Zucchini Salad

I’ve been staring at zucchini in the crisper drawer for days – and of course, it multiplied. I don’t know how it does that. One minute you have three little demure zucchini hanging out in the fridge, then suddenly there are eight, they are huge and they are staring back at you! There must be an algorithm for this monster…if three go in and eight come out the formula may be 2x + 2, but how does one explain their increase in size?

Not only are the zucchini in the fridge multiplying, but mother nature has determined that running the oven in our house is not an option. With temps in the 90s and dew points in the 70s, there will be no zucchini crusted pizza, gratin, or cake. I just can’t risk the respite of an air-conditioned space when facing these extremes. So the zucchini remained chilled, and it’s growth pattern stopped in a quick zing through the shredder. I tossed this salad in lemon, olive oil and agave like in the Sweet and Sour Slaw with Wilted Kale from a couple of weeks ago, and it turned out very light, refreshing and delicious.

Note: The zucchini will drain quite a lot of water once you put the salt on it, so it should be served shortly after combining the vegetables with the dressing.

Ingredients:

  • 4-6 medium zucchini and yellow squash, grated
  • 1/4 white onion, thinly sliced
  • 1 red pepper, grated
  • juice 2 lemons
  • 2 Tbs. olive oil
  • 2 Tbs. agave nectar
  • salt to taste.

Directions:

Grate and slice the vegetables. Squeeze the lemon over the zucchini, add the olive oil, agave and salt and mix well.

Vindaloo Roasted Potatoes and Cauliflower

When Jeff tried this dish, he said, “Mmm, tastes like candy.” The Vindaloo I used comes from Penzeys, and it is a spice mixture made with coriander, garlic, ginger, cinnamon, mustard, hot peppers, cardamom, turmeric and cloves. Any curry powder roasted with veggies would taste great, but I particularly enjoy the cinnamon in this version. Roasting it brings out its’ sweet rich flavor and it pairs nicely with sweet roasted cauliflower.

When large quantities of root vegetables start rolling around in the bottoms of the CSA boxes, roasting is a great way to quickly work through the veg. The veggies can simply be tossed in a titch of olive oil, spread out over a cookie sheet and baked until they are tender or beginning to brown. In the roasting process, natural sugars begin to caramelize, and for veggies with a low water content, a lovely crunch develops on the outside. You can prepare a mixture of veggies on one sheet as long as you cut the pieces to the same size. I felt comfortable roasting both the potatoes and cauliflower together as the potatoes were babies – already creamy and soft to start, and I wanted to allow the cauliflower to crisp and caramelize.

Fennel is the next veg that will take a ride through the roasting cycle. I’m thinking thin slices of fennel, onion and apple tossed in olive oil, salt and pepper to be served on toast…

Ingredients:

  • 2 pounds new potatoes, cubed
  • 1 head cauliflower, cut into florets
  • olive oil
  • salt
  • pepper
  • cumin seeds
  • Vindaloo Curry

Directions: Preheat oven to 425 degrees. In a large bowl, drizzle olive oil over the veggies. They should be lightly coated. Then generously sprinkle with salt and freshly ground pepper. Next add cumin seeds and curry to lightly coat.

Spread the veggies out on a baking sheet in a single layer. Roast until browned and crispy – about 35 minutes.

Sweet and Sour Slaw with Wilted Kale

I’ve really been moving towards simple lately; cleaning out the basement, organizing cabinets, and sending excess stuff off to the thrift store. It’s such a liberating feeling for me to see a basement storage shelf empty, old things out with no new to replace, and clean uncluttered lines as I look around the house.

The same goes for my food. I love the surprise of layered flavors, but lately I’ve wanted to shed a few pounds. To do this I have opted for simple, unadulterated and mostly raw. I figured, it’s so easy to over-eat when food is rich and delicious, so I thought if I keep my food simple, I won’t be overly preoccupied with it. I’m trying to cut my addiction to a high calorie and high-carb diet by changing my thinking and simply focusing less on food. To get my mind off food, I’ve lowered my carb intake to about 30 percent of my daily calories. I’m staying away from grains and sugars, and am eating mostly salads and beans. I’m also eating most of my calories in the early part of the day and staying away from food after four in the afternoon. I think summer and having the CSA veggies has made this really easy to do.

Basically what this means, is I am doing lots of veg prep and very little cooking. I’m spending little time in the kitchen or dining room, and having very few dinner parties. I’m doing everything I can to stop thinking about food so much – have you noticed?

Ingredients:

  • 1 bunch kale, deveined and chopped
  • 1/2 head red cabbage, thinly sliced
  • 2 Tbs. olive oil
  • 2 lemons, juiced
  • 2 Tbs. agave nectar
  • salt

Directions:

Saute the kale in a large skillet in just a bit of olive oil. Lower the heat, cover and let it steam for a few minutes until bright green and tender.

Mix the red cabbage, kale, lemon juice, olive oil, agave and salt in a large bowl. Allow the salad to marinate in the fridge for at least an hour.

GIANT Kohlrabi

Our CSA box was the lucky winner this week of the great Minnesota Pineapple! I don’t usually photograph while I’m cooking, but as I began to cut this baby, I knew it needed a “before” picture to truly appreciate whatever the “after” would be. The after remained a mystery – what would I do with my giant kohlrabi? I contemplated grating it and creating some sort of slaw, but eating that much raw kohlrabi in one sitting caused my breath consternation. I love the crisp fresh taste initially, but after a few pieces, I begin to dislike the effect. I have the same affinity for radishes, but have found that I rather enjoy them when they’re roasted. Ah Ha! The answer was to roast this baby, not in chunks or fries, but in a way that would celebrate it’s largeness.  I opted for thin, full-body slices splashed in a little olive oil, salt, pepper and panko bread crumbs. It turns out that the skunky-breath thing turns into a sweet caramel flavor when roasted, and reminds me a little of cooked rutabaga.

These are not pancakes! It’s a giant kohlrabi – sliced and roasted.

Ingredients:

  • kohlrabi – as much as you want
  • olive oil, to lightly coat cookie sheets
  • salt and pepper to taste
  • panko bread crumbs

Directions: Preheat oven to 450 degrees.

Peel and thinly slice the kohlrabi. Drizzle a bit of oil on the bottom of your cookie sheets. Place the thin kohlrabi rounds on the sheet and flip them over so they have oil on the top as well as bottom. Sprinkle with salt, pepper and bread crumbs.

Roast for 30 minutes or until they begin to brown.

Summer Potato Soup

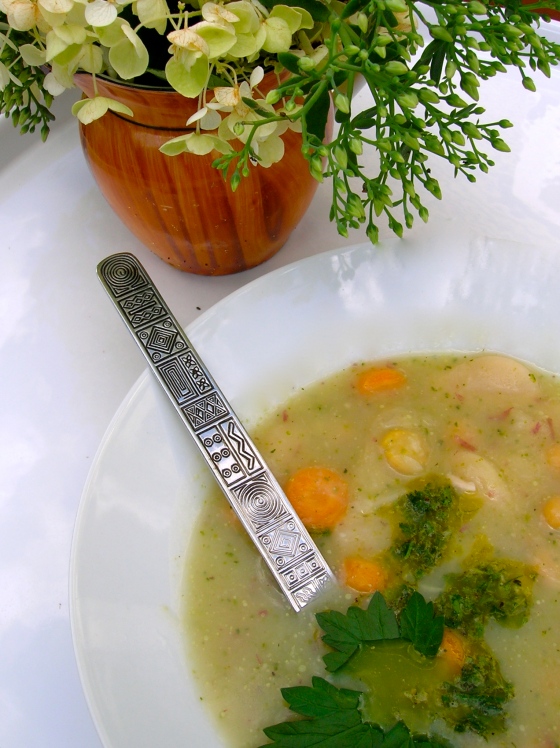
This is another kid-friendly soup that makes mama happy with all kinds of “goodness” hidden inside. This pureed number sports new potatoes, onions, garlic, zucchini and carrots that all help to nourish the body: low-fat, high protein, high fiber, vitamin packed. But who cares about all that after a week of trips to the old-fashioned candy store, all-you-can-eat Oreos, and making faces on Ritz crackers with Easy Cheese? Watching the boy scarf down two bowls of the soup without a single complaint makes me think his body was in need of nutrients after the “Up North at the Cabin” binge.

Ingredients:

  • 1 Tbs. olive oil
  • 1/2 large red onion, diced
  • 8 cloves garlic, smashed
  • 2 pounds red potatoes, diced
  • 1 medium zucchini, cut into chunks
  • water to cover potatoes
  • 6-8 small carrots
  • 2 cups large lima beans, pre-cooked
  • 2 cups garbanzo beans, pre-cooked
  • 2 tsp. salt
  • freshly ground black pepper
  • pinch hot pepper flakes

Directions:

Heat olive oil in a stock pot. Add onions and saute on a low heat until they begin to brown. Add garlic and cook for a minute – remember, don’t let it burn! Add diced potatoes and fill the pot with enough water to just cover them. Bring the water to a boil, and cook the potatoes until they are just tender. Add the zucchini and cook for a few minutes.

Puree the onion, garlic, potato and zucchini with an immersion blender or a standard blender. I used a standard because I wanted it finely pureed. (Max doesn’t like potatoes or zucchini!) You may need to do the blending in two batches.

Return the puree to the stock pot and add the carrots. Heat on a low simmer until the carrots are cooked. Add the pre-cooked garbanzo and lima beans to the mix. Season with salt, pepper and pepper flakes.

Note: This soup was garnished with an herb chimichurri that I made with a handful of fresh herbs, a the juice of one lemon, about 1/4 cup olive oil, a clove of garlic and salt and pepper.

Snap Pea Chutney

All cooks have a signature style. More often than not, mine is heavily dependent on the food processor, and involves creating slathers, spreads and dips. All cooks who are bloggers have a signature style, too. Our photos begin to look the same, the reader recognizes dishware, a preferred backdrop and lighting tendencies, but more importantly, the food begins to look like other previously created dishes. We all fall back on cooking practices that lie within our repertoire.

This fresh snap pea chutney, however, will fool you. I know it looks like other spreads and slathers I have created, but this one is surprising. You’ll be even more astonished when you find how it was served this evening.

Before I get to that, let me give you a little background. On the Fourth of July, my most favorite auntie brought for appetizers, a huge bowl of garden fresh snap peas – move over edamame! We sat around the kitchen table shelling the crisp little bundles and munching on fresh peas. Well, that got me to thinking about the snap peas that came in my CSA box. Last week we ate our snap peas with the pod on a chop salad, but this week I decided to shell them and turn them into a sort of chutney.

I also got a new cast iron wok to play with, so wanted to mix up a little Asian dinner. How could snap pea chutney and a stir-fry be paired? With peanuts and mint, what else! Bring on that fresh Southeast Asia blend to lighten a hot and spicy crispy fried green bean and ginger-fried cabbage. Do they do this in China? Do they serve a light condiment like they do in India to help relieve the heat, layer flavors and surprise the palate? Well, today it happened in my kitchen and it was fantastic.

Snap Pea Chutney

  • 1 cup fresh snap peas, shelled
  • 1 handful mint and cilantro
  • 1 garlic scape cut into 1-inch chunks
  • salt and pepper
  • 1/2 cups roasted, unsalted peanuts
  • 1 Tbs. peanut oil
  • 1/2 lime, juiced

Directions:

Steam the peas over boiling water for three minutes until bright green and tender. Place all ingredients into food processor and pulse until blended. I opted to leave this one a little chunky, and the texture was a nice contribution to the meal.

Baked (or not) Veggie Dip

Effortlessness is taken for granted. In the skills we have, we forget how it came to be that we do them effortless-ly. We forget that first we loved something and wanted to do it all the time, and then repeatedly put ourselves into a position where continued practice became a part of life.

Cooking is for me a skill that is mostly effortless, and every now and then I am reminded of where I started. My neighbor told me a funny story the other day about trying to get her husband to cook occasionally. He agreed to cook, thought it was a cool idea, and then, throughout the actual cooking process proceeded to ask questions like, “Is this the measuring cup you use? How much salt should I add? Is this the pan you would use?” She had to point out that if he was going to ask all those questions and need constant guidance, it was really like she was cooking anyway. She had been hoping that he would be able to take on the task and only call for her when dinner arrived on the table. We all had to go through the process of learning how much salt and which pan would work best, but when the skill becomes effortless, we forget.

Recently, I had the opportunity to watch a cook who makes it look effortless. Another neighbor, and CSA sharer, Courtney, whipped up some game snacks for a World Cup game a few days ago, and her work was impressive. She knew exactly where everything was, she had a plan, and her work was done efficiently. I never once pained while watching her, and in fact, marveled at her plan and technique.

Her brilliant and simple idea was to make a baked veggie dip using kale, spinach and broccoli from our CSA box. I riffed on her idea and spiced it up just a bit with some jalapeno. If you choose to bake it, do it quickly as the greens will brown under heat. I heated the one above under the broiler for just a few minutes which seemed to work well.

Baked Veggie Dip

  • 2 tsp. olive oil
  • 3 cloves garlic, minced
  • 1 small bunch “adolescent” kale, chopped
  • 1 bunch fresh spinach, chopped
  • 1 small head broccoli, chopped
  • 1 fresh jalapeno
  • 1 small bunch fresh basil
  • 2 0z. cream cheese
  • 1 cup Pecorino Romano
  • 1 cup white cheese (provolone, mozzarella, cheddar)
  • Dash salt
  • Freshly ground pepper
  • splash of milk

Directions:

Saute garlic for a minute in hot olive oil, add broccoli, kale and spinach. Cook until veggies are bright green and wilted.

Cut the hard cheeses into small chunks and run through the food processor, or grate them if you don’t have a processor. Add the cream cheese, jalapeno, basil, salt and pepper and the sautéed veggies. Pulse the processor until everything starts to pull together. Add the milk through the feed tube until the dip is creamy.

Put the dip into a small baking dish or ramekin. Bake for a few minutes right under the broiler until bubbly and beginning to brown.

Garlic Scape Saute on Toast

I have found that the CSA veggies this time of year lend themselves well to stir-fries and sautes. The fresh greens can be sauteed with garlic and rolled into an omelet, they can be sauced with ginger, garlic and lemon and thrown in with pasta, or simmered with a lovely coconut curry to top a bowl of rice. Today’s rendition landed on toast triangles as a late summer afternoon appetizer.

Leftover prepped veggies from a batch of Farm Fresh Spring Rolls made earlier in the week made this snack super easy to prepare, and the garlic scapes and spring onions gave it lots of flavor. To really give it a flavor boost, we served the appetizers topped with my neighbor’s (and CSA sharer) scape pesto. I asked her for the recipe to print here, and her lovely handwriting along with a returned plate and a few fresh strawberries made the most beautiful still life. Enjoy!

Garlic Scape Saute on Toast

  • 1 Tbs. olive oil
  • garlic scapes, sliced long and thin
  • green onions, cut into thin, long sections
  • kohlrabi, julienned
  • Swiss chard, sliced into long ribbons
  • salt and pepper to taste

Directions:

Heat the oil in a large saute pan on high heat. Add the veggies and saute until they are wilted and beginning to brown. Add salt and pepper.

Serve on triangle toast with crusts removed and top with a dab of pesto.

Potato Salad with Herb Yogurt Dressing

I’ve never really been a huge fan of creamy potato salad as I’m not too fond of mayonnaise, but I’m crazy about Greek Gods Traditional Yogurt, and it is finding its way into much of my cooking lately. This yogurt works well in place of sour cream with a livelier flavor and a denser texture. We love a little dollop on top of burritos, in a bowl of soup, or just plain off the spoon! It’s also been on sale at the co-op for the last couple of weeks, so has become a new staple in our household. With garlic and fresh herbs, this potato salad dressing also makes a great dip for crudites. My Foxtail Farm CSA provided broccoli, garlic scapes and herbs to the dish.

Salad Ingredients:

  • 5 pounds potatoes, peeled and diced
  • 1 head broccoli, chopped
  • 4 garlic scapes, thinly sliced into rounds
  • 4 sweet pickles, minced

Yogurt Dressing:

  • 1 cup plain Greek Yogurt
  • 1 clove garlic, pressed (use only the part that comes out of the garlic press holes, and toss the fibrous part)
  • 1 handful fresh herbs, slivered (I used basil, chervil, rosemary, oregano, and thyme)
  • 1 tsp. rice wine vinegar
  • salt and pepper to taste

Directions:

Dice potatoes and rinse them in cold water to remove excess starch. Boil in salted water until just tender and drain in a colander. Run cold water over them to stop the cooking.

Steam the chopped broccoli until just tender – about two minutes. Mix all vegetables together in a large serving bowl and refrigerate until cool.

To prepare the yogurt dressing simply mix all ingredients in a bowl. Season with salt and pepper. When the potatoes and broccoli have cooled, gently mix the dressing into the potato mixture.