Freezer Sauerkraut – Good Gut Bacteria

IMG_3577

How to make fast Sauerkraut

Last year I made sauerkraut in August, and because it was so warm out, I decided to only let it ferment for one week (Not sure that’s logical, really!) Then being completely lazy the day I decided it was done, I packed it in 1 quart Mason jars, and FROZE it! That’s right, I threw the jars in the freezer, and let me tell you, this made the BEST sauerkraut ever. By freezing it the kraut tastes fresh, keeps a nice color and doesn’t get that indescribable “bleh” taste and texture of canned kraut. Here’s the coolest thing – when you take it out of the freezer to defrost, you can watch it begin to ferment again! It’s just a little bit fizzy and effervescent for the first few days – beautiful!
IMG_3581

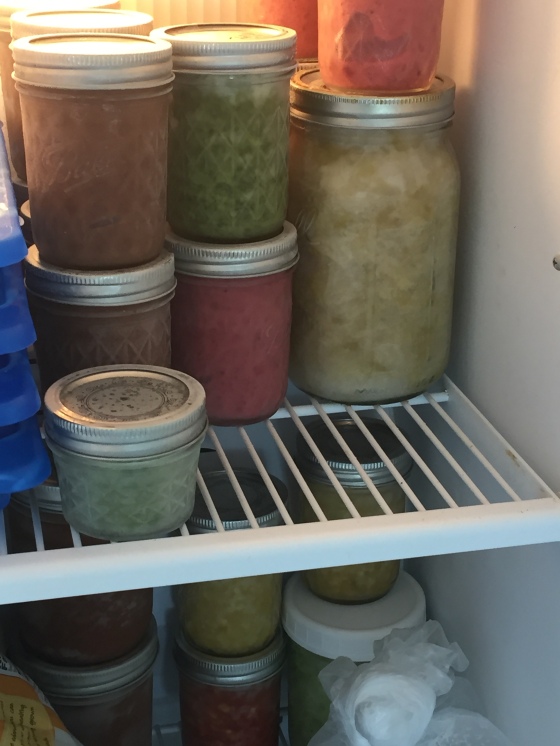
To answer your question after looking at these pictures, yes, I freeze a lot of food in canning jars. A few years ago I started putting all my tomatoes, salsas, pasta and pizza sauce, chimichurri, banana ice cream…really anything that fits in a jar makes a good candidate for freezing in jars. And, NO they DO NOT BREAK as long as you don’t overfill them or bang them around! I stack them as you can see – safe and sound.

So, haul out your giant food processor, grab as many cabbages as you want to make into kraut, put in the slicer attachment to any thickness you like, dump the stuff in a fermentation vessel or big bowl, and sprinkle with salt. For every cabbage use about 1 TABLESPOON of salt. Mix the salt into the cabbage well using your bare hands, gloved hands or a big set of tongs – whatever fits your comfort zone. Then all you do is cover it well, leave it in a dark place for a week and pack in jars for the freezer.

How do you cover it while fermenting? That is a BIG discussion in the world of fermentation and everything seems to be pesky, but it doesn’t need to be. Some fermentation vessels have ceramic discs made just for the sole purpose of pushing down the fermenting veg to help keep it under the brine, others have lids that have a liquid seal, and some have both. If you are budget minded, or simply don’t want to invest in a big heavy crock, there are alternatives.

DIY Fermenting Vessels

One method to make fermented veg is to use a big bowl with a plate on top. It’s great if the plate fits down inside the bowl just a little, but not imperative. Some of your veg is going to float to the top of the brine and that is okay. With a week of fermenting and salt to protect it, you won’t have any weird stuff growing other than the weird stuff we want! If you do leave sauerkraut to ferment in a cool place for longer than a week, you might see a little harmless white mold grow. The pros say to just scrape it off. Eww! I’m a little squeemish about that idea, so I prefer to get the fermenting done before any molds grow!

Another great way to submerse the bulk of your veg is to use large pieces of the veg you are fermenting as weights. So, if you are making sauerkraut, keep some of the large outer cabbage leaves to use as a protective cover under your plate. Or, if you want to weight it down, cut out the core of the cabbage and lay those on the top. Regardless, cover the veg the best you can so that it is submerged under the brine. I like to add a plastic bag over the top if the fermented veg is in a bowl as some veggies, like cabbage and radishes, can get a little pungent after a couple of days. Farm Curious gives some great budget-minded tips for other ways to ferment and protect your veg.
IMG_3579

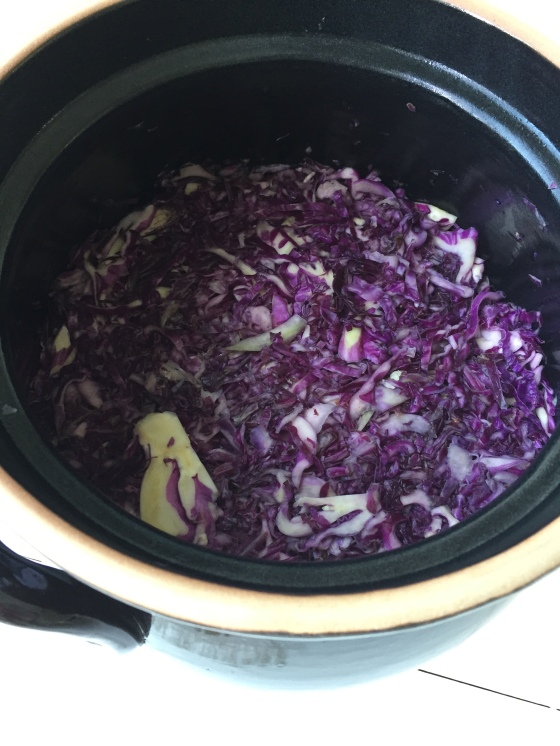
I splurged a couple years ago on a fermenting crock from Poland – it’s fat and heavy! Since owning the farm it has been great fun because it holds A LOT of veg. I can pack 25 heads of cabbage into this baby! Of course, I have trouble eating that much sauerkraut, but it is fun to make. As you can see from the red cabbage, this year’s sauerkraut is going to be PINK!

Feeling-Sorry-for-the-Radish Pickle

Radish Pickles

IMG_1430

I really never thought I’d like radishes that much let alone develop enough empathy to actually feel sorry for them. I tend towards narcissism when it comes to the spicy little nuggets – I could care less if they come or go.  Today however, between raindrops in the garden, I saw little rosy butts literally jumping out of their snug beds with cracking skins exposing a crisp white chasm of flesh. Oh! It was so sad. I realized this travesty was a direct result of too much water. The spicy buggers were water-logged! I couldn’t help but imagine how they must feel – so fat and tight in their pants! Really, it was quite a shock! I first noticed this odd behavior after Saturday’s storm with five inches of rain. In fact, some were literally toppled over in the garden as if clawing their way out of a freshly dug grave. They were nearly able to escaped the deluge. I thought perhaps the lighting caused this unique experience, but it was today when their skins started to pop that I realized they were just too full to take any more.

So, I saved them and turned them into pickles! I never made radish pickles before (well, actually, I made some yesterday, too, so I knew I would like them – delicious!) so I wasn’t sure how I would like them prepped – sliced, wedged or whole. I decided to make all three. How do you prefer your radish pickle?

I’m not leaving the recipe here, but you can ask Mr. Google if you don’t know how to can, and the brine recipe can be found here.

Sweet and Sour Sauce

I’ve been in a Spring Roll frenzy as of late. I crave them nearly every day and love the fact that I can load nearly five servings of veggies into just one roll. They are super easy to make, and if stored properly, keep in the fridge for many days. Jeff, on the other hand, is not quite as passionate about them as I am, although he likes them.  After days of enjoying fresh spring rolls with spicy sesame ginger sauce, I offered Jeff the final serving to which he replied, “No thanks.”  Feeling somewhat dejected, I asked why he does not enjoy the spring roll as much as I, and his reply was, “They would be great with Mock Duck and Sweet and Sour Sauce.” Ah hah! Now I am happy because I won’t have to eat spring rolls alone. All I have to do is include the duck and the sauce. It’s a good thing.

It’s funny how when you buy things from the store and never have a tradition of cooking the item from scratch, it can seem so mysterious and intimidating to think about recreating it.  I don’t think I could have listed the ingredients of sweet and sour sauce before yesterday. I just assumed it was a flavor infused syrup of some sort. The fact that it’s thickened with cornstarch and can be made with fruits and vegetables really surprised me. I loved the idea of sweetening the sauce naturally with pineapple and its’ juice in order to keep the sugar content a little lower. Considering such a small amount is consumed in one sitting, I am not going to feel as guilty about feeding this to my family as I would have had it been a commercially processed product.

I searched through at least a million recipes until I got the general gist of the sauce. There’s an amazing rendition on Tastes Like Home that I would have preferred, but the boys like their chunks smaller, so I went with a grated version. In fact, I sent the onion, carrot and ginger all through the grater attachment on the food processor which made this really easy to whip up. It’s still got quite a lot of sugar, but at least it has some fruit and veggies as well. Making it from scratch is also very economical. Using all organic ingredients, this project cost perhaps six dollars and yielded about five cups of sauce.

By the way, I found these wonderful jars at Ikea today. Since I’ve been into making refrigerator pickled peppers, I was really psyched to find the jars!

Ingredients:

  • 1 can crushed pineapple
  • 6 oz. pineapple juice
  • 1/2 medium onion, grated
  • 1 medium carrot, grated
  • 1 inch piece of ginger, grated
  • 1 cup rice vinegar
  • 1 tsp. chile flakes
  • 3/4 cup brown sugar
  • 1 tsp. salt
  • 2 Tbs. soy sauce
  • 3 Tbs. corn starch dissolved in 4 Tbs. cold water

Directions:

Place all ingredients into a sauce pan except the corn starch mixture. Let the ingredients simmer for five minutes or so, then add the cornstarch to thicken. Let it cool a bit and pour into glass storage.

Pickled Peppers

Today I had one of those “Duh” moments in life. Jeff and Max and I are huge fans of pickled jalapenos. Jeff loves them on pizza, finely chopped in his burritos, or the standard American form, scooped up with a plate of nachos, and I love to add them as a garnish for soups. Neither of us likes, however,  when they are mushy, and the brand they carry at the co-op is terrible. As I rarely shop elsewhere, we unfortunately go without our pickled jalapeno fix more often than not.

I have canned jalapenos in the past, and was sad to discover that they also turned out mushy. Because of this, I have given little thought to any DIY approach as of late. The “Duh” moment came when I realized I could make them as a refrigerator pickle. In this manner, they spend less time in the heat thereby retaining their crunch. Ah ha!

The “Duh” moment came together as a little vision. I have a couple of these glass jars that are normally used to store nuts, but one of them had been empty for a few weeks alone on the counter looking silly. Then I came across a sale on fresh jalapenos and suddenly had a vision of them floating in the empty jar in brine as a refrigerator pickle. A little on-line research proved my idea was possible, and this is what appeared on my porch!

Note: I took this photo on the front porch as the morning sun was coming up with the hope that perhaps the heat of the jalapenos would appease the kitchen gods, and they in turn, would speak to the sun god to bring Minnesota a little more heat on this first day of Spring!

I followed David Lebovitz’ recipe mostly, but added two white onions and five cloves of garlic. This recipe fits my jar, but it may not fit yours. The Purple Foodie directed me to a Michael Rulman hint to size brine to the container. He suggests packing the jar with whatever you plan to pickle and then fill it with water. Dump the water out into a measuring container, and then remove half of it. Replace the water removed with vinegar. So smart!

Pickled Jalapenos

  • 1 pound fresh jalapeno peppers, sliced
  • 2 medium white onions, sliced
  • 2 3/4 cups water
  • 2 3/4 cups vinegar (I used white distilled vinegar)
  • 3 tablespoons sugar
  • 2 tablespoons salt
  • 2 tablespoons whole coriander seeds
  • 5 cloves garlic, peeled
  • 2 tablespoons black peppercorns

Directions:

Pack the jar with onions, garlic and jalapenos. Bring the water, vinegar, sugar, salt, coriander seeds and peppercorns to a simmer in a non-reactive pan. Allow the mixture to simmer for about five minutes. Pour it over the veggies, cover and let cool on the counter. Once the mixture is cooled it can be moved to the fridge. It sounds like these are better after a few days rest and can be kept for many weeks.

Frozen Garlic and Onion Puree

IMG_3324

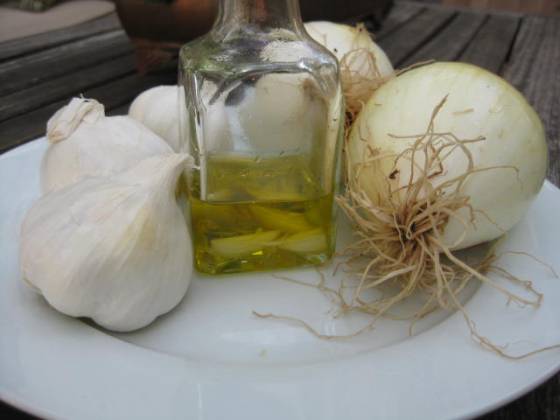
Onions and garlic are rolling out of the fields and into our kitchens, and school is about to start. What do these two ideas have in common? Kids, shortcuts and planning ahead. Here’s the kid part: I am fortunate to have a child who is proud to tell anyone that he likes onions, but I know lots of families with picky eaters who will go through great pains to avoid these foods. My Brazilian aunt couldn’t stand that her daughters wouldn’t eat onions or garlic, so she began to puree them with olive oil. When she cooked, the flavors were there, but no visible remains were to be seen or picked out by the girls. The adults in the family no longer had to suffer through a bland meal and the kids were happy too.

IMG_3337

I’ve made pastes like Thai curry and roasted chile and frozen them successfully before, so I thought I’d see what happens with the onion garlic combo in the freezer. I wasn’t sure what freezing onions and garlic would do to their flavor, so I did a little test run, and I think I’ll be very happy having two containers of this stuff when it comes to whipping up quick soups and other one-pot meals in the fall when I’m busy with teaching. That’s the short-cut and planning ahead part.

IMG_3329

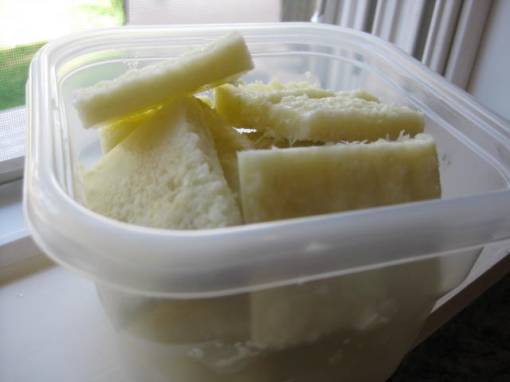
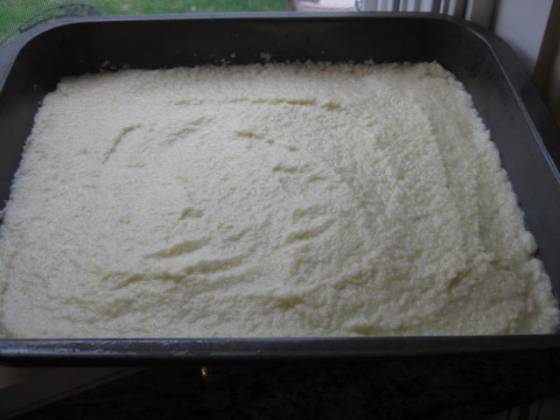
I have an automatic ice-maker and no ice cube trays so instead I use a cake pan to freeze my purees.

IMG_3333

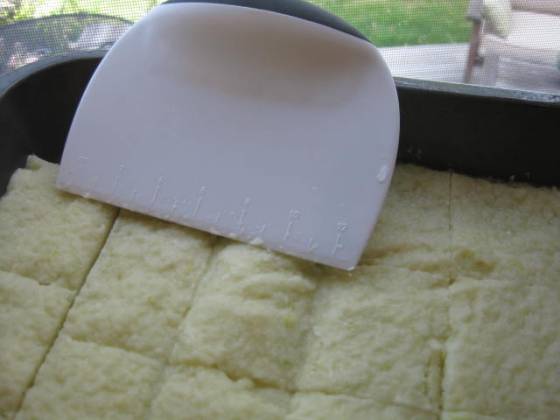
Once the paste is a little frozen, I score it with my pastry blade then pop it back into the freezer to firm up.

IMG_3335

After it freezes a little longer, score it again on the lines. Now the squares can be removed and placed into a freezer container for later use.

Next fall and winter when using the frozen puree, just start with some oil in a hot pan and drop one of the squares in. Once you break it all apart, lower the heat. You’ll want to just let it cook enough to release the flavors, but not burn the garlic.

Frozen Garlic and Onion Puree Recipe

Ingredients:

3 large onions

3 whole heads garlic, peeled

olive oil

Directions:

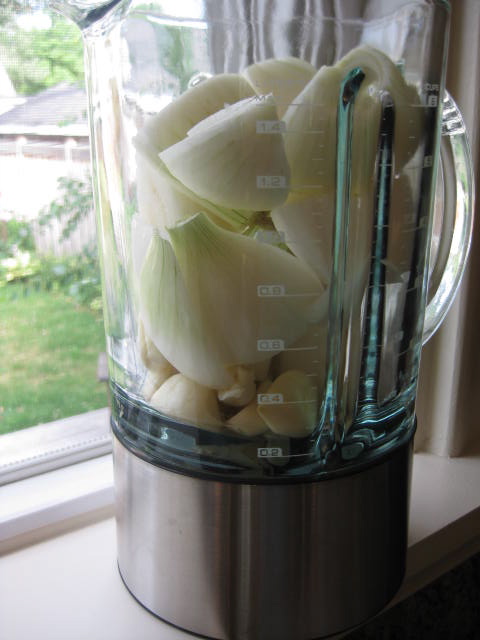
Peel the garlic, chop the onions and puree them in a blender. You will need to pulse and push the vegetables down. Add only enough oil to make the mixture smooth. Follow the directions above for freezing, or spoon into ice-cube trays. Once the cubes are made, they should be kept in a good airtight freezer container. I’ve used both freezer bags and the new ziplock brand freezer containers. I like the containers better because they can be reused many times.

Note: I have a Breville Blender with a wide bottom base. It works great for jobs like this.

Pickled Cabbage

I know all of you looked at the Pupusas and thought they looked interesting, but you weren’t ready to take that one on. I know. But, I gotta tell you, they are so utterly satisfying, and so unbelievably tasty with this side of curtido – pickled cabbage. You don’t know what you’re missing! Jeff and I had Pupusas for breakfast both Saturday and Sunday. Not only did we load them up with the curtido, but also some cotija (Mexican dry cheese a little like parmesan) and a little bit of crema agria (Mexican sour cream) – amazing!

IMG_3200

I made the curtido on Thursday last week, and it just keeps getting better in the fridge. Next time I plan to serve Pupusas, I’ll make sure the curtido is at least a few days old. It will keep in the fridge for about a month!

Ingredients:

1 head cabbage thinly sliced

2 red onions thinly sliced

2 jalapenos minced

5 cups boiling water

apple cider vinegar

2 tsp. salt

2 Tbs. sugar

Mexican oregano

Directions:

1) Slice the cabbage and onions and place is large bowl or big flat baking dish

2) Mince jalapenos and mix in with cabbage and onions

IMG_3174

3) Boil water – when it comes to a boil, pour it over the cabbage mixture. Mix the water into the cabbage for a minute, then dump the water off

IMG_3178

4) Add enough vinegar to almost cover the cabbage

5) Sprinkle salt, sugar and oregano over cabbage and mix

6) Place cabbage in a glass container. Push the cabbage down so that it is mostly covered in vinegar. Place a plate on top with a weight to keep the cabbage pushed down. Refrigerate.

Pickled Vegetables

Pickled Vegetables (To serve on Bahn Mi sandwich)

1 bunch radishes

2 purple kohl rabi

2 carrots

1/2 cup white vinegar

1/2 cup sugar

1 tsp. salt

1/4 tsp. red pepper flakes (optional)

Direction: In a saute pan heat vinegar, sugar and salt until dry ingredients dissolve. Grate or thinly slice vegetables. Put veggies and brine in a covered glass container to steep for a few hours in the fridge.