Green Savory Scones for a BROWN and GRAY Day

I spent a couple hours out in the gardens this morning cutting back some of the junk that should have been removed last fall, but as I was away – it got done today. There are a few little greens starting to pop up here and there…mint, lupine and of course, CREEPING CHARLIE! But, overall, the landscape out here in the Driftless Area is mostly brown. So, why not green up the kitchen a bit?

I had some cilantro and fennel left over from the Socca I made last Sunday that needed to get used up, so the idea to make a savory scone came to mind. I haven’t made scones in forever and now I can’t for the life of me remember why not? They are so DURNED TOOTIN’ easy. All in, I invested no more than twenty minutes of my time – including clean up – to get these puppies in and out of the oven.

I’m going to tell you my SPEED trick – mostly so I don’t forget it myself! Haul out the food processor. Zing up all the wet stuff. In another bowl mix the dry stuff. Then combine, shape into a disc, cut into eight triangles and bake. WOW SO FAST! In the 15 minutes they baked, I had the kitchen all back to tidy with time enough to chat with a FB friend in between!

Savory Herb Scones preheat oven 400 degrees

DRY INGREDIENTS:

  • 1¾ cups sprouted wheat flour
  • ½ tbsp baking powder
  • ½ tsp baking soda
  • ½ tsp salt

WET INGREDIENTS:

  • Handful (Maybe a big cup) cilantro, stems and all
  • Handful (Again, a cup or so) fennel frond mostly
  • 1/4 red onion
  • 1/2 jalapeno

PULSE THE HERBS and VEGGIES BEFORE ADDING NEXT INGREDIENTS

  • ¼ cup coconut oil (chilled)
  • ¾ cup Soymilk or Almond Milk

DIRECTIONS: Add your wet ingredients to the dry, mix until just combined. Depending on moisture in your herbs and veg, you may need to add a bit more flour, but try to leave the dough a bit sticky and DO NOT OVERWORK it.

Put a little flour onto the counter, form the dough into a disk. Cut into eight sections and put those on a cookie sheet lined with parchment paper, or not.

To MAKE THEM REALLY CUTE – Spray a bit of olive oil on the top of each scone, then sprinkle each with thyme, flaky salt and fresh-ground pepper.

Bake for 15 minutes until they are golden brown – bottoms will show more browning than tops. Just try to not eat them all in the first 15 minutes that they come out of the oven!

Oh, For the LOVE of LEMON Shortbread Cookies

Oh, I am deep into cookie making lately. One little gingersnap danced through my kitchen and led me down the path to citrus heaven! Over at the farm site, you’ll find a new rendition of my old favorite Lemon Spice Cookie – this one made for lazy days and an easy sweet treat. It’s another GOTTA HAVE IT for your cookie repertoire! You can find the new simplified the recipe on my other site – DRIFTLESS DIRT. Click the photo above or link to the left to check it out! I guess that Ginger that snapped and danced needed a partner!

Does your GINGERSNAP and Dance Vegan?

Here’s a snappy little vegan number you’ll want to add to your cookie repertoire! I posted the recipe on my other site – DRIFTLESS DIRT. Click the photo above or link to the left to check it out! For more Driftless Dirtfarm gossip, hit the “Dirt” button on the home page of my new site.

Mucking in the DIRT – Get Messy with Me!

screen-shot-2017-02-19-at-7-30-36-am

Greetings to all my recipe loving adventure seeking friends! I wanted to let you know about my new project over at Driftless Dirt. I’m still going to be posting a recipe here and there, but the new escapade involves a lot more about life on the Driftless Dirtfarm. If you like laughing at a city girl living in the country, gardening, watching flowers grow, doing crazy projects, building things, tearing down things, or watching tractors drive by, you might want to check it out. I hope you will subscribe to the website so I can dump a little Driftless Dirt in your mailbox! Click the link or picture above to go exploring! See you soon.

img_6329

Sweet Potato Chocolate Cake – Vegan and Gluten Free


img_6321
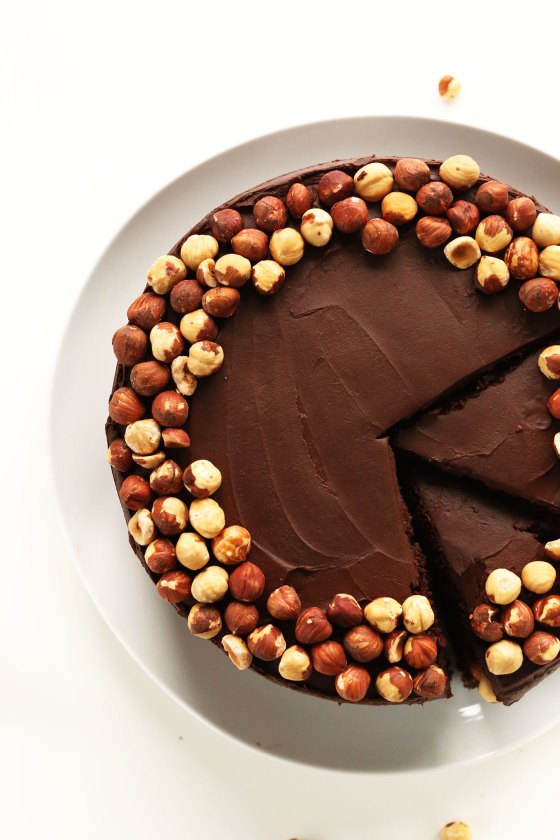
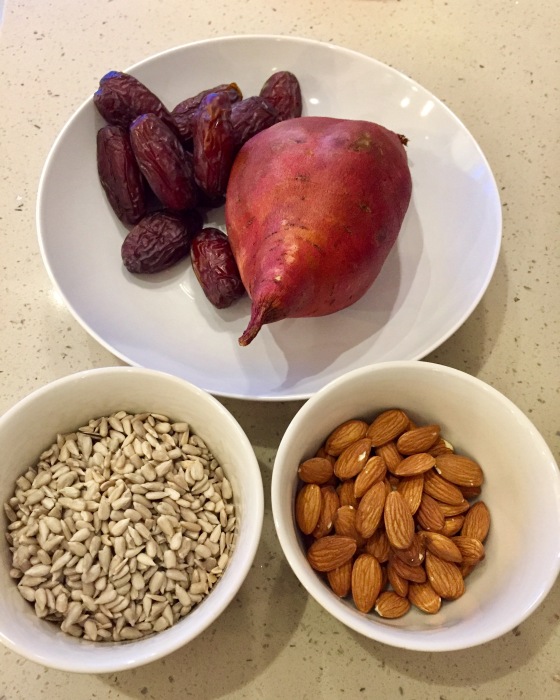
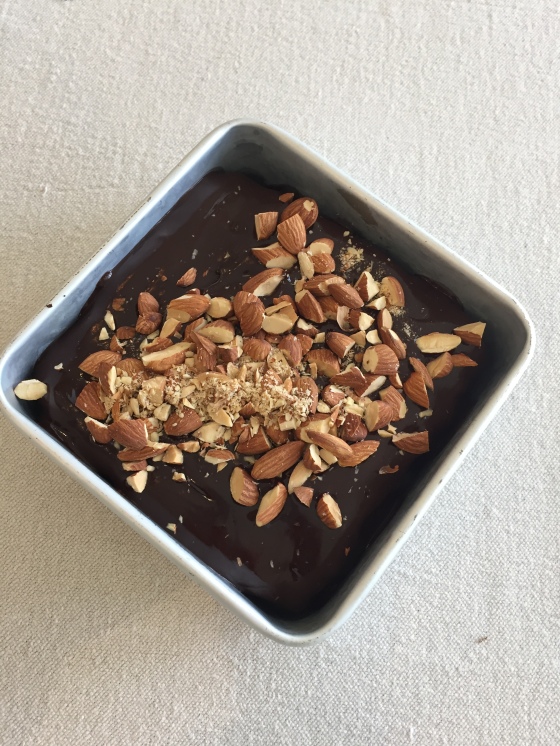
I’m not usually one to make cakes, cookies or sweet breads, but if they are made with chocolate and sweet potatoes, I am easily convinced! Dinner with vegan friends on Saturday night and a promise to bring dessert has thrown my sweet tooth into a crazy chocolate frenzy! Perhaps more than the idea of baking something with both sweet potatoes and chocolate was the challenge to create something with whatever I have in the pantry at the moment. I do get a kick out of being able to make something out of nothing especially when I am cooking from the farmhouse and the nearest grocery is twenty minutes away.

I don’t know how many of you do this, but when I am looking for a new recipe, I use keywords like vegan chocolate cake, but instead of looking at the recipes, I look at the images. I want to find something that gives me a visual of what I might like to eat. And, with the very talented food photographers in the world today, it can be a dangerous hobby to do on an empty stomach! In my quest for Saturday dessert ideas, I stumbled across the Minimalist Baker’s beautiful Chocolate Hazelnut Cake and knew that I had to create something along those lines. I love that she has whole hazelnuts between her cake layers and for tasteful decorating on top – classy! I am a huge fan of a powerful nut crunch of any sort along with a forkful of gooey, fudgy chocolate.

the-best-vegan-gluten-free-chocolate-hazelnut-cake-1-bowl-and-so-rich-and-delicious-vegan-glutenfree

So, once I choose a picture of something I think I might like to recreate, I toggle over to check out the recipe. Minimalist Baker’s recipe Chocolate Hazelnut Cake calls for lots of things I do have in the pantry and lots of things I don’t have. Her recipe obviously calls for hazelnuts, but I only have almonds. Her recipe calls for applesauce, but I only have a sweet potato. Her recipe calls for gluten-free flour, but I only have brown rice flour. Basically, I decide I have pretty much everything I need to riff off her fabulous ideas and delve into a little jazz improv of my own. Some key ingredients used as replacers for original components in the recipe are medjool dates and one giant sweet potato to replace the applesauce and sunflower seeds and almonds to replace the hazelnuts. I also traded out balsamic vinegar for apple cider vinegar and reduced both quantity and types of sugars. Because baking soda always seems to find me in sweet bread – yuck, I cut it by one-third. I figured with the vinegar, this cake will rise with less baking soda and I wanted it to be dense and fudgy. Goal accomplished!

img_6303

This cake is everything I dreamed it would be – rich, dense and fudgy – punctuated with toasted almonds and deeply satisfying for someone who does not want to include animal products in their diet. It is completely plant-based and delicious! Try it. I even made a small extra in case I need to go to another party…or just eat it all myself!

img_6325

Ingredients for Cake:

  • 1 large sweet potato or 2 small (enough for about 2 cups mashed)
  • 1 cup sunflower seeds, toasted and ground into meal
  • 1 cup whole almonds, toasted then chopped
  • 12 large pitted medjool dates
  • 4 Tbs. flax seed meal
  • 2/3 cup water
  • 1 cup almond milk
  • 1 1/2 tsp. balsamic vinegar
  • 1/2 cup maple syrup
  • 1/2 cup raw honey
  • 1/2 cup coconut oil (I recommend unrefined virgin coconut oil retains more coconut flavor)
  • 1 tsp. vanilla
  • 1 tsp. baking soda
  • 1/2 tsp. salt
  • 1 cup cocoa powder
  • 1 cup gluten free oats ground into flour
  • 1 cup brown rice flour

Ingredients for Icing:

  • 1 cup almond milk
  • 4 squares unsweetened baking chocolate
  • 1 cup coconut oil
  • 1 cup powdered sugar
  • 1 tsp. amaretto liqueur

Directions for Cake:

Step 1: Wash and prick sweet potatoes. Place them in a bowl to microwave on high for 5-7 minutes depending on the size. Cook the sweet potato(s) until soft and allow to cool.

Step 2: Preheat oven to 350 degrees. Place sunflower seeds and almonds on separate baking sheets to toast (unless, of course, you bought pre-toasted, unsalted nuts). Toast seeds and nuts until they start to brown. It helps to stir the sunflower seeds as they toast. Once toasted, remove from oven to cool.

Step 3: Once sunflower seeds are cool, grind to flour in a food processor with 1 cup gluten free oats. Add 1 cup brown rice flour and 1 cup cocoa powder then transfer these dry ingredients to a mixing bowl.

Step 3: In food processor add dates, flax seed meal, water, almond milk, balsamic vinegar, maple syrup, honey, coconut oil, vanilla, salt, baking soda and scooped out flesh of the sweet potatoes. Pulse until the dates are pureed.

Step 4: Add the wet ingredients from the food processor to your dry ingredients in the mixing bowl. Mix by hand or with a mixer.

Step 5: Oil cake pans or line with parchment. This recipe will make two 8 inch diameter cakes, two loaf pan cakes, a dozen cupcakes or one shallow 9 x 13 pan.

Step 6: Bake cake(s) for 35 – 45 minutes depending on thickness or depth of pan. Check with toothpick or knife. This is a moist cake, so never leaves the knife completely dry, but you will be able to see the crumb develop.

Directions for Icing:

Step 1: Put 1 cup almond milk and 4 squares of unsweetened baking chocolate in a bowl for 2 minutes in the microwave.

Step 2: Remove mixture from microwave and stir until chocolate melts into the almond milk. At this point it will seem grainy.

Step 3: Add coconut oil and mix until melted into baking chocolate and milk.

Step 4: Add 1 cup powdered sugar and 1 tsp. amaretto. Mix well. Now the chocolate icing will be smooth and pourable.

Step 5: Pour the icing over the cakes and decorate with chopped toasted almonds.

Potato and Sauerkraut Hotdish

IMG_3115

This is the crowd pleaser of all crowd pleasers – the “MUST HAVE” on the holiday table, the easiest thing to bring for a potluck, and well, AMAZINGLY delicious. Let’s just say this is one old-fashioned, the-way-it-used-to-be-before-canned-soup HOTDISH! But potatoes with sauerkraut? This lesser known concoction was brought to the Midwest by our creative German ancestors and usually contained sausage or bacon. (I know, I can hear you right now, “Ooh bacon, that’s a good idea!” Don’t even think about it!) My mother learned of the recipe from a neighbor who originally hailed from the Pierz area of Minnesota – a German stronghold. Hotdish tends to be very provincial as each kitchen cook has their own secret ingredient. If you prefer to call it a casserole then we’ll know you’re not from Minnesota!

Midwest church-goers are famous for their potlucks where you can find Tuna, Hamburger, Tator Tot as well as other noodle, meat and canned soup concoctions. For some reason my family always called these things casseroles, and tuna was the only one I was familiar with thanks to Grandma’s inability to cook, and my parent’s strict adherence to the edicts of food improvisation.

Unfamiliar, that is to say, until I entered the hot lunch program at my local Elementary School. I took a brief foray away from vegetarianism and learned the nuances of true Midwest Culinary Cuisine. Not only did I enjoy the hotdish repertoire, but it was in those cafeterias that I learned of “Shit on a Shingle” – otherwise referred to as “Chipped Beef on Toast.” I also had the pleasure of discovering Spam, American Cheese slices, and Corn Dogs. You must remember, I was a child of the “Back to the Land” movement. I knew where food really came from so this highly processed stuff was totally foreign to me. It also drove me quickly back to the comforting lap of the vegetarian diet.

Don’t get me wrong, I love hotdish. I am by nature, a lazy cook and lover of all things comfortable. I love the ease of the one pan meal and the idea that I won’t have to cook for a few days as with casseroles, if you’re not feeding a crowd, there are leftovers.

A couple of years ago my mom came to one of the family dinners with this potato and sauerkraut casserole thingy. It got high approval ratings from everyone, especially my potato loving husband. I’ve never had to make it only suggest that Mom bring it for our gatherings, but as the red potatoes from the CSA keep rolling in, I decided it was high time to make my own hotdish. So I called Mom for the recipe. My mother cooks like I do – it’s always a creative process, there is never a recipe and if an interruption occurs during the preparation, the meal is terrible!

Here’s my mom giving me the “recipe.”

“Well, you just need to drain the sauerkraut and boil the potatoes. Then I saute the sauerkraut in a lot of butter with garlic . When the potatoes are done, break them up; Don’t really mash them, just smash them, and add them to the sauerkraut. I like to put jalapenos in it and some cheese. That’s it, then you bake it.”

“What kind of cheese do you use?”

“Whatever I have. I always have lots of cheese. I might use feta or mozzarella. I always put parmesan in it- whatever you have. I wouldn’t use cream cheese or sour cream because I don’t like those.”

Thanks, Mom!

Making this casserole really got me excited about making sauerkraut as well. I have a huge cabbage from the CSA so I think I’ll give it a try. Here’s a great link showing how to make Sauerkraut. I was interested to find that during WWII it was considered patriotic to make your own sauerkraut. I never knew sauerkraut to be a particularly political pickle.

Ingredients:

  • 1 large jar or bag of sauerkraut – 32 oz.
  • 5 pounds new baby reds
  • 1 stick butter
  • 3 cloves garlic
  • 1 jalapeno diced
  • 1 pound fresh mozzarella
  • 1/2 cup parmesan
  • 1 cup chopped green beans (optional)
  • Idea Note: Chopped herbs would be fabulous to add to the top or incorporate into this dish.

Directions:

Boil the potatoes until tender. When they are cool enough to handle, smash them with a potato masher. Drain the sauerkraut well and meanwhile saute the garlic in melted butter. When the garlic releases its fragrance, add the sauerkraut and saute for a few minutes. Mix the sauerkraut with the potatoes in a big bowl. Use a food processor to chop the jalapeno and mozzarella. Mix everything together. Pour it all into an oiled baking pan. Sprinkle the parmesan on top and decorate with green beans. Bake for 1 hour at 375 degrees.

Detoxing in Thailand

img_5481

In Thailand the lotus flower symbolizes purity of body and mind. When the flower buds and blooms, it rises above the muddy waters clean and beautiful. The lotus is a metaphor for clean, healthy and happy living.

Detoxing in Thailand

I am SO HAPPY to be in Thailand after months of eating bread, wine and cheese! Don’t get me wrong, those things are wonderful, but when you eat them en masse over a long period of time, a grumpy brain starts to take over. If winter or the holidays are making you feel overweight, sluggish or depressed, Thailand is a wonderful recovery destination with its plethora of fresh fruits, vegetables and ENORMOUSLY flavorful low-calorie cuisine. It’s the place where healthy fresh food, full of nutrients and flavor, will pull you out of your slump and get you re-centered after a crush of calorie-rich holiday foods and winter stressors.

Many of the foods we enjoy over the holidays are great at causing inflammation – bread, cheese, alcohol and sweets – all cause the body’s immune system to go into overtime and cause damage to itself. The good news, a diet rich in fruits and vegetables, can actually slow down this bad type of inflammation making you feel more energetic and healthy. Sounds good, doesn’t it?

img_5476Vegetarian Papaya Salad with Carrots, Long Beans and Cabbage Served with Tamarind Lime Dressing and Roasted Peanuts

But, it’s not always easy to eat a nutrient-rich diet at home. In our own routines, it is SO hard to find the will-power to say NO to the office bagels or donuts, to say NO to the Friday night pizza or say NO to wine and cheese with a friend. Sometimes we just need to remove ourselves from our routines for a while and land in a place where healthy eating is the norm.

I’ve been traveling extensively as of late and just came out of a 90-day tour through Europe feeling physically bloated and mentally depressed. Coming from the firm belief that food should be our medicine, I entered Thailand determined to heal. After all, Thai food is notoriously full of fresh vegetables, fruits and detoxifying herbs and aromatics, whereas European food often accompanies cheese, bread, beer and wine. Thailand seems a good place to travel to get the body back in shape.

What is DETOX? I like to think of detox as cleansing the body. It’s the idea that we may be able to flush out harmful invaders in the form of free radicals – agents that might promote cancer cells to grow, or in the least wreak havoc through inflammation. Detox means bombarding our body with vitamins, antioxidants, and phytonutrients while flushing out toxins that are causing inflammation. By eating a variety of nutritionally dense foods, we help to heal our bodies from the inside out. The cuisine of Thailand definitely qualifies as nutrient dense!

To help get myself back on track in Thailand with healthy eating, I followed these steps:

  1. Remind yourself, it feels good to eat well. I remembered how satisfying it feels to eat fresh fruit and veggie juices, salads and smoothies. Refusing bread, pasta and dairy in Thailand doesn’t mean missing out on anything. In fact, it will be hard to even find these things here – except for noodles which are most often made from rice and not inflammatory. The fresh dishes are so satisfying, I wonder why even bother with baguets!
  2. Cut out a few calories a day. I made a pact to cut back on calories just a bit. It’s no fun to diet while traveling, but cutting out a few hundred calories a day is easy here. Since Thailand is quite warm, I feel full faster, so eating smaller portion sizes is easier. Because it’s hot, I also drink lots of water which gives me a feeling of fullness. Plus, easy access to fruit and healthy snacks allows me to accomplish that whole, “Six Small Meals a Day” deal that is so tricky back at home. By enjoying food a little here and a little snack there, I’m not be so hungry as to overeat. All of this helps me feel satisfied with one large meal a day.
  3. Get moving. In Thailand I got moving. My trip through Europe was a bit too sedentary, but here I have space for Yoga and Pilates and can walk the beach enjoying the sun as it sets to the west. Physical constraints of travel can make exercise difficult, so it’s nice that here I have some built-in space.
  4. Practice healthy habits. Thailand is the “Land of Smiles,” – a country of kind happy people who know how to make travelers comfortable. The tenets of Buddhism imply that following a path of practice towards mental insight – yoga, meditation, reflection or simply rest – will help end any suffering caused by stress. The practice of healthy eating also helps to diminish discomfort caused stress. I love this idea and remember each day that I am “practicing” all the steps needed for health and wellness. 

img_5463

Use FRUIT to get started.

Fruit is a great way to start a detox, and in Thailand there is a wide variety. Have you ever seen a dragon fruit? These pink spiny looking things hold a white seedy flesh that is sweet and somewhat reminiscent of kiwi. I love that they come with their own bowls – just cut one in half and spoon out the flesh! Dragon fruit are so delicious and chock full of vitamins C and B as well as healthy seeds with the fatty acids we want – think chia! They have calcium and the seeds contain a mild laxative – surely to help with detox!

Another fruit I enjoy here is papaya. It’s another detox powerhouse with HUGE levels of vitamin C and A, and its ability to help with digestion. Between digestion-aiding enzymes and fibre, papaya is a potent force in the gut helping to process food and flush out the old. Although sweet, papaya is low on the glycemic index making it a good choice for weight loss as well.

And how about that pineapple? Well, pineapple helps digest proteins in the gut. Protein, especially the kind from cheap meats like hamburger or processed meat are tough to break down, so cause inflammation or other problems like gout. But, pineapple has another of those digestive enzymes called bromelain, that the body loves. Pineapple also helps prevent blood clots, works against cancer cells and can help make a person look younger. That’s an idea I LOVE!

On top of all the nutritional benefits of these fruits, they also work to reduce stress and increase energy. Double win for me!

img_5478

The most striking thing about Thai cuisine is the depth of flavors. In this Tom Yam (soup), hot and sour mix with the pungent healing properties of ginger, lemongrass, galangal, lime, chile and kaffir lime leaves. This light low-calorie soup packs in EXTREME flavor of aromatics full of anti-inflammatory goodness that help fight against cancer, lower cholesterol levels, balance blood pressure, detoxify the liver, maintain healthy blood sugar levels, support respiratory health, help with digestion…just to name a few.

Of course, there are a few treats in Thailand that can’t be missed – coconut curries, fried eggrolls and sweet and sour dishes  – they are higher in calories but equally as delicious when shared with a friend. Fortunately, for someone trying not to overdo it, a beautiful thing about Thai cuisine is that plates are meant to be shared, so tasting a decadent dish doesn’t leave me feeling the negative effects of inflammation.

Thai people seem to have it going on in terms of healthy eating, and I am happy to be here to learn a little about it! In one week, my grumpy brain has completely turned off, I feel more energetic despite the heat and look forward to eating more DRAGON FRUIT tomorrow!

img_5480

Lemon Spice Cookies

Feeling like your holiday cookies need a little updo? This lemony ginger spice cookie may just be what you are looking for! This cookie’s chew is addicting, the flavors fresh and intriguing, and oh so perfect for the holiday tray with a little dusting of snowy white confectioner’s sugar. If you’re like me and hardly ever bake because you can’t live with the temptation, this is the perfect cookie. These cuties don’t last long if anyone else is around.

I originally posted this recipe a couple of years ago when lemons filled my mind for days. Lemons are enticing, but what caused this recipe creation was not only the idea of lemons, but a divine Indian dish with coriander…hinting of lemon! Sometimes obsession and distraction make for a happy child. A sudden urge for a really good chewy cookie and voila was born the lemon spice cookie recipe that had been floating around in my head.

When the idea hit me, I knew I would base the recipe on my childhood favorite chewy gingersnap recipe from The Joy of Cooking, but with lemony spices instead of molasses and cloves. I would use lemon zest, lemon grass, ground coriander and ground ginger. To lighten the color of the cookie, I replaced the molasses with honey. I was hoping for the crinkle effect of a gingersnap, but for some scientific reason, that did not occur. Does anyone know why not? I used baking soda and vinegar…doesn’t mixing these two cause the chemical reaction needed to make cracks in the cookie…or is molasses involved?

I’ll include the original gingersnap recipe below as well. If you love chewy cookies, it’s an amazing recipe.

Ingredients:

Makes 4 dozen cookies

  • 3/4 cup butter
  • 2 cups sugar
  • 2 eggs
  • 1/2 cup honey
  • 2 tsp. white vinegar
  • 2 tsp. vanilla
  • zest 1 lemon
  • juice 1 lemon
  • 1 Tbs. finely pureed lemon grass (I used Gourmet Garden Lemon Grass prepared product)
  • 2 tsp. ground coriander
  • 2 tsp. ground ginger
  • 1 1/2 tsp. baking soda
  • 3 3/4 cup all-purpose flour

Directions:

Preheat oven 325 degrees.

Cream together the butter and sugar. Add all the other ingredients except the flour and mix well using a hand or stand mixer. The last step is to add the flour and mix together well.

Form dough into 1-inch balls. Bake on a cookie sheet for 12-15 minutes. When the cookies cool, cover them with sifted powdered sugar.

Gingersnaps from the Joy of Cooking

Preheat oven to 325 degrees

Cream together:

  • 3/4 cup butter
  • 2 cups sugar

Stir in:

  • 2 well-beaten eggs
  • 1/2 cup molasses
  • 2 tsp. vinegar

Sift and add:

  • 3 3/4 cups all-purpose flour
  • 1 1/2 tsp. baking soda
  • 2 to 3 tsp. ground ginger
  • 1/2 tsp. cinnamon
  • 1/4 tsp. cloves

Mix ingredients until blended. Form dough into 3/4 inch balls. Roll the balls in sugar. Bake on a greased cookie sheet about 12-15 minutes.

Freezer Sauerkraut – Good Gut Bacteria

IMG_3577

How to make fast Sauerkraut

Last year I made sauerkraut in August, and because it was so warm out, I decided to only let it ferment for one week (Not sure that’s logical, really!) Then being completely lazy the day I decided it was done, I packed it in 1 quart Mason jars, and FROZE it! That’s right, I threw the jars in the freezer, and let me tell you, this made the BEST sauerkraut ever. By freezing it the kraut tastes fresh, keeps a nice color and doesn’t get that indescribable “bleh” taste and texture of canned kraut. Here’s the coolest thing – when you take it out of the freezer to defrost, you can watch it begin to ferment again! It’s just a little bit fizzy and effervescent for the first few days – beautiful!

IMG_3581

To answer your question after looking at these pictures, yes, I freeze a lot of food in canning jars. A few years ago I started putting all my tomatoes, salsas, pasta and pizza sauce, chimichurri, banana ice cream…really anything that fits in a jar makes a good candidate for freezing in jars. And, NO they DO NOT BREAK as long as you don’t overfill them or bang them around! I stack them as you can see – safe and sound.

So, haul out your giant food processor, grab as many cabbages as you want to make into kraut, put in the slicer attachment to any thickness you like, dump the stuff in a fermentation vessel or big bowl, and sprinkle with salt. For every cabbage use about 1 TABLESPOON of salt. Mix the salt into the cabbage well using your bare hands, gloved hands or a big set of tongs – whatever fits your comfort zone. Then all you do is cover it well, leave it in a dark place for a week and pack in jars for the freezer.

How do you cover it while fermenting? That is a BIG discussion in the world of fermentation and everything seems to be pesky, but it doesn’t need to be. Some fermentation vessels have ceramic discs made just for the sole purpose of pushing down the fermenting veg to help keep it under the brine, others have lids that have a liquid seal, and some have both. If you are budget minded, or simply don’t want to invest in a big heavy crock, there are alternatives.

DIY Fermenting Vessels

One method to make fermented veg is to use a big bowl with a plate on top. It’s great if the plate fits down inside the bowl just a little, but not imperative. Some of your veg is going to float to the top of the brine and that is okay. With a week of fermenting and salt to protect it, you won’t have any weird stuff growing other than the weird stuff we want! If you do leave sauerkraut to ferment in a cool place for longer than a week, you might see a little harmless white mold grow. The pros say to just scrape it off. Eww! I’m a little squeemish about that idea, so I prefer to get the fermenting done before any molds grow!

Another great way to submerse the bulk of your veg is to use large pieces of the veg you are fermenting as weights. So, if you are making sauerkraut, keep some of the large outer cabbage leaves to use as a protective cover under your plate. Or, if you want to weight it down, cut out the core of the cabbage and lay those on the top. Regardless, cover the veg the best you can so that it is submerged under the brine. I like to add a plastic bag over the top if the fermented veg is in a bowl as some veggies, like cabbage and radishes, can get a little pungent after a couple of days. Farm Curious gives some great budget-minded tips for other ways to ferment and protect your veg.

IMG_3579

I splurged a couple years ago on a fermenting crock from Poland – it’s fat and heavy! Since owning the farm it has been great fun because it holds A LOT of veg. I can pack 25 heads of cabbage into this baby! Of course, I have trouble eating that much sauerkraut, but it is fun to make. As you can see from the red cabbage, this year’s sauerkraut is going to be PINK!

Farm Exteriors Uplifted

When we bought it, this sweet house and all of its fifteen acres was nearly overgrown and smothered by giant ragweed, nettles and burdock. A storm, a week or two before we closed on the property, left tree limbs strewn about so we couldn’t even see the granary down the hill unless we were positioned just right in the yard. From the house, the first day we spied on the place, we didn’t know about the granary or the pig barn as they were nearly overgrown. I was fixated on the house at first and gave little thought to the land – that would come later, in my mind. However, we would soon learn that land is the main concern in the country!

IMG_0689

Looking up towards the house when we found the granary.


Brushpiles and Barn

Granary with dead branches and weeds – the view from the yard.


IMG_0581

The clay tile pig barn nearly overgrown with elms and burdock.


img_2703

The pig barn after trees and weeds were removed. It’s in rough shape, but we hope to preserve it as best we can.


IMG_0682

We begin clearing the land a few weeks after the purchase.


View from Bedroom

The pump house fondly referred to as “The Snoopy House.”


img_1959

The new roof goes on a very hot day. The original forest green shingle siding was practical, but not cute!


img_2024

The pump house – clean and crisp! No more red and green.


img_2031

Pump house gets decorated! And the door eventually gets painted black.


IMG_0583

Our first day at the house – the realtor had just mowed so we could get a good look.


Southwest Corner

Future site of the deck off the kitchen.


West Exterior

We moved the sliding door, added windows and converted entirely to electric and wood.


Slider moved and windows added

Here is the deck in progress. The vinyl siding went off and on a few times during the projects before we replaced it completely with fibre cement board.


Building the deck off the kitchen

Western exposure makes for a hot deck in summer afternoons.


IMG_1177

Deck is done, siding back on, new windows and painted trim. Notice by now it is Fall!


IMG_1694

The following Spring/Summer we build the screen porch and prepare for perennial gardens to plant the following Spring.


IMG_1888

New windows in the porch and tiny plants in the deck side perennial bed.


IMG_2729

A Summer and Fall of work and the siding and new roof are on.


North Exterior

North side of the house and the bathroom/laundry room addition added by previous owner.


IMG_2730

Northside with addition of screen porch, deck, siding and steel roof.


Roadside View

Before: East side view of the property with vinyl siding. This is the roadside view.


img_2056

East side making progress.


IMG_2733

After: Eastside view from “front” yard.


Driveway and Garage

Before: Garage in need of some TLC.


Garage Exterior

Garage looking to the East on the day we closed. The doors hadn’t been closed in years according to the neighbors.


img_1884

Bodega added to garage for wood storage.


IMG_2727

The garage and bodega with gutters to catch rain water that runs in underground pipes to a cistern near the gardens.


IMG_2459

We will be warm for the winter!


IMG_2677

A bike trellis made by mom in one of her creative bursts! A great signature piece for the boy’s garage!


IMG_1171


IMG_0489

View towards the porch the day we bought the place. June 2013.


IMG_1885

Renovating the porch windows March 2015.


IMG_2279

Steel roof went on summer 2015.


IMG_2676

A new Spring 2016 ready for border gardens.


IMG_2436

Spring 2016. The house is done except bathroom remodels.


IMG_2739

Lap siding combined with board and batten.


IMG_2728

The “Driftless Dirtfarm” is taking shape.


IMG_3164

Deck garden the first summer – I will need to do some dividing soon!


Late Summer Bread Pudding with Roasted Tomatoes

IMG_3607

Right before it went into the oven – I forgot to take a picture when it came out!

Another zucchini hanging out looking cute in your kitchen, but all your stand-by zucchini recipes exhausted? Well, here’s a great dinner crowd idea that is sure to please – and it is really easy.

I have two bread puddings in my life: one is the stuffing that my aunt, Susy makes for Thanksgiving every year and the other is a sweet bread pudding that I experienced then recreated after taking our son to King’s Island in Kentucky one summer.

The sweet bread pudding is a dense, eggy spiced dish with a rich caramelized bourbon topping – very simple, but decadent and satisfying. The bread and eggs prevent me from allowing frequent visits to my kitchen – in fact, it has been years now since I’ve made it.

My aunt’s stuffing does not have eggs and it has always been my favorite dish on the Thanksgiving table. She sautées onions, garlic and celery, tosses in a few toasted walnuts and sage and mixes dry bread with a bit of vegetable stock. Seasoned with a bit of salt and pepper this concoction is pushed down into a baking dish to develop a thick crust around the edges. It is simple, and absolutely delicious!

So, with bread pudding on my mind, and an extra loaf of bread from the Smiling Pelican Bakeshop in Maiden Rock, I began the search for a new late summer recipe idea to help manage the glut of tomatoes and zucchini in the garden.

IMG_3583

Roasting some tomatoes to decorate the top became first priority. But, if you try this recipe, don’t use foil on the baking pan like I did! I had a piece leftover that was covering something, so I thought I’d just recycle it – I wished I had used my Silpat instead, but I still made it work. These tomatoes were sliced thick, drizzled with olive oil, sprinkled with a titch of salt and impaled with a smashed piece of garlic before roasting.

IMG_3585


IMG_3589

The filling that is mixed with the bread includes sautéed onions, garlic, basil, a grated zucchini and three medium tomatoes chopped. I seasoned with salt and pepper. This was mixed with cubed bread, spooned into a covered baking dish, topped with the roasted tomatoes to make it cute and baked at 400 degrees for an hour and a half. I took the lid off the baking dish after about an hour. Truly easy. Truly delicious!

This is also a great dish to make ahead and freeze for later baking! I made this two days before the meal – just threw the covered casserole into a plastic bag. The day I needed it, it went straight into the oven.

IMG_3588

Ingredients:

  • 1 loaf of any bread – stale or not
  • 5-6 medium tomatoes – 2 sliced, 4 diced
  • Garlic
  • Olive oil to drizzle
  • 1 medium onion
  • 1 medium zucchini, grated
  • 1 handful fresh basil, chopped
  • Salt and pepper to taste

Directions:

Heat oven to 400 degrees. Slice fresh tomatoes, lay them out on a cookie sheet, drizzle with oil and salt. Flip them and drizzle again with oil and push into the middle of each about a third of a smashed piece of garlic. Roast until the edges begin to caramelize.

Saute diced onions in a bit of olive oil until translucent then add 3-4 minced garlic cloves. Cook for a minute or so just until the garlic becomes fragrant. Turn off the heat. Then add the diced tomatoes, grated zucchini, basil, bread cubes and salt/pepper.

Once all the ingredients are well mixed, pout it into a covered casserole baking dish, push the pudding down, top with the roasted tomatoes in a decorative fashion. Bake for one hour covered, remove the lid and bake for another 30 minutes uncovered.

Lessons in Gardening with Weeds

IMG_3638

Are you in a battle against weeds? A lot of the articles I have read about weeds argue it is important to know what kinds of weeds you have in order to effectively control or combat them. But I would also argue that it is important to understand why they are in your garden in the first place. Their presence tells a story, and I have come to learn that they cannot be beat. We must join them!

Since owning this farm, I have learned a lot about weeds, how to manage them and how to get completely bamboozled by the little stinkers! Weeds in the country are brawny and bold. They will not stop or pause for much. I have come to understand why it is that farmers use herbicides, because stopping a weed from doing its job is next to impossible. That’s right, weeds have work requirements, and contrary to popular belief, their main duty is not to aggravate humans! I try to empathize! Weeds do a great job protecting our top soil from eroding. Weeds spread low and wide often to do this. Other weeds send down long tap roots to bring minerals up out of the soil, and some weeds deliver nitrogen to nearby plants. And we all know, bees love their flowers!

IMG_3643

Here we see the spread of dandelion, crab grass, clover and chick weed all working together to cover unprotected soil.

Of course, my vegetables have a hard time growing with too many weeds as neighbors, so I do have to work at taming them.

When we first moved here, our first line of defense against the weeds was the mower. Mowers are very handy machines that are quite effective at keeping weeds at bay. Continuously cutting them back often causes their demise. If not complete death, they are at least stunted or camouflaged as lawn.

IMG_3640

Weeds in the gravel driveway!

This Spring was early which gave the weeds a jumpstart. By June my gravel driveway was completely invaded with weeds that had nestled in between the small rocks and set roots. What do you do, weed your driveway? I figured there must be an ecological perspective about how to manage this problem. I need the driveway to give support to the cars or they would squish down in the soil when it rains. In my quest for an answer, I read an article about seeding runways in Alaska with fescue. That seemed to be the answer to my problem. I seeded the driveway and now mow it very short. It hasn’t completely filled in yet, but it actually looks very nice – a little hard to find the driveway from the road – but visually attractive. The weeds can still be on the driveway, but they will be camouflaged by grass. I can live with that.

IMG_3639

Driveway after seeding (first year).

But what do you do about the weeds that are in the cracks, under trees and in other hard to reach places? Well, in the city a layer of landscape fabric and 4-6 inches of mulch usually does the trick. Out here, that’s laughable! I found out the hard way that weeds in the country simply pop right up out of landscape fabric no matter the thickness or industrial strength. Mulch also poses a problem in that its little crevices are the perfect place for all the airborne seeds to land. One year after mulching in the country, you will likely find a whole slew of dandelions, burdock, thistle or crab grass just to name a few. Mulch is really just compost feeding any happy seed trying to grow in it. It seems to me that anything that will cover and fill in quickly is key. Our farmhouse gardens have these plants growing like living mulch and they do a great job making the landscape look attractive and weed free.

IMG_3653

White blossoms, loves shade, doesn’t spread overly quickly…no idea what it is.


IMG_3655

No idea what this is called.


IMG_3652

Violets cover the perennial bed between Lilacs and Mock Orange bushes.


IMG_3651

This stuff looks like Queen Anne’s Lace when blooming in June, but it’s low-growing and does not have a tap root like the wild carrot. Anybody know?

In my quest for weed management, I also learned about energy displacement. Take burdock for example. Burdock sends down a deep tap root and foliage that resembles rhubarb. If you let it grow, in the late summer it has spiny little flowers with a pinkish purple hue. These lovely spiny flowers dry out and become the burrs that cling to your dog’s fur as they run for a stick. But, if you know how burdock grows, you will know that it takes two years to flower. The first year it spends its time making a huge tap root and lovely foliage. The second year the root grows again and by mid summer, it will send up a shoot where the seed heads will form. If you cut it right around the time it is trying to seed, you kill its energy supply. You can also effectively kill it by chopping burdock off just below the surface of the soil – basically slicing the top off the tap root. The last week in June or first week in July has jokingly been dubbed, “Burdock Eradication Week.” I spend the week with a sharp shovel or edger jabbing the huge foliage leaves off the root. I have not completely eradicated the burdock from my property, but with careful management like this it is doable. Cutting back the burdock provides a huge nitrogen supply for my compost!

IMG_3658

Pretty burdock flowers!

Thistles on the other hand! What the heck! I get that these guys are 1) prolific, 2) tenacious and 3) bringing minerals to the surface, but they will beat you off if you move into their house!

IMG_3647

Thistles in mass where potatoes once grew. This area has raised beds with at least four inches of straw to cover. We laid industrial grade landscape fabric under six inches of wood chips last year. This year, thistle mass despite black plastic!


IMG_3646

The LOST Garden – completely overrun with amaranth and thistle.

And, I apparently moved into their house. Last year we built our second permanent raised bed circle garden and enjoyed one year of perfection. The garden was a beautiful addition to the property and I had lots of fun with the extra space. This year, however, is another story. Our warm winter, very little snowfall and early spring allowed for the weed seeds to get a head start, and the thistles celebrated! Last year I kept them smothered in straw, green manure and garden plants. This year they had a homecoming party before I even got into my galoshes to check out the gardens. I tried in vain to pluck them into submission, but by the end of June I had to quit. I shut the gate on their house and will not return until next year with a new strategy in my back pocket.

These guys need the old-fashioned till and dry treatment first. I’m thinking constant cultivation will help sprout, dry and kill a few of these buggers. Then I’m hoping buckwheat as a cover crop and its allelopathic tendencies will help prevent lots of seeds from germinating. To help keep the soil covered and not invite a new crew of weeds, I will till in the buckwheat and seed with winter rye. That will help smother out the little rascals in the fall and spring. Once that gets tilled in, I will have the added benefit of improved soil. I may even repeat the whole process again with another round of buckwheat and rye before I even consider planting another vegetable garden in that spot. Don’t I sound smart! Watch for future “eat crow” episodes where I again honor the weed! Any suggestions besides, “Hey, Sarah! Use Roundup!” are welcome.

So, what have I learned about living in the country? First, I have learned a little about how to manage weeds, and that there is a whole lot I don’t know! More importantly, I have learned to find ways to live with them. It seems that understanding their purpose has helped me feel better about coexisting.