

How to make fast Sauerkraut
Last year I made sauerkraut in August, and because it was so warm out, I decided to only let it ferment for one week (Not sure that’s logical, really!) Then being completely lazy the day I decided it was done, I packed it in 1 quart Mason jars, and FROZE it! That’s right, I threw the jars in the freezer, and let me tell you, this made the BEST sauerkraut ever. By freezing it the kraut tastes fresh, keeps a nice color and doesn’t get that indescribable “bleh” taste and texture of canned kraut. Here’s the coolest thing – when you take it out of the freezer to defrost, you can watch it begin to ferment again! It’s just a little bit fizzy and effervescent for the first few days – beautiful!
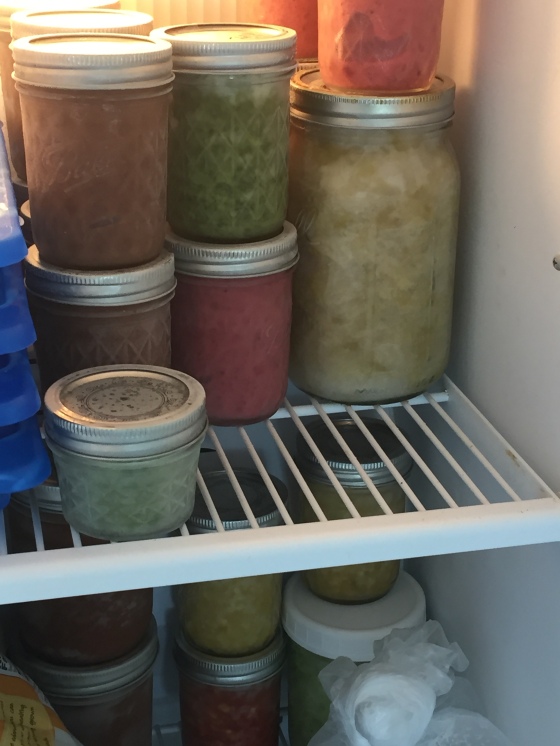
To answer your question after looking at these pictures, yes, I freeze a lot of food in canning jars. A few years ago I started putting all my tomatoes, salsas, pasta and pizza sauce, chimichurri, banana ice cream…really anything that fits in a jar makes a good candidate for freezing in jars. And, NO they DO NOT BREAK as long as you don’t overfill them or bang them around! I stack them as you can see – safe and sound.
So, haul out your giant food processor, grab as many cabbages as you want to make into kraut, put in the slicer attachment to any thickness you like, dump the stuff in a fermentation vessel or big bowl, and sprinkle with salt. For every cabbage use about 1 TABLESPOON of salt. Mix the salt into the cabbage well using your bare hands, gloved hands or a big set of tongs – whatever fits your comfort zone. Then all you do is cover it well, leave it in a dark place for a week and pack in jars for the freezer.
How do you cover it while fermenting? That is a BIG discussion in the world of fermentation and everything seems to be pesky, but it doesn’t need to be. Some fermentation vessels have ceramic discs made just for the sole purpose of pushing down the fermenting veg to help keep it under the brine, others have lids that have a liquid seal, and some have both. If you are budget minded, or simply don’t want to invest in a big heavy crock, there are alternatives.
DIY Fermenting Vessels
One method to make fermented veg is to use a big bowl with a plate on top. It’s great if the plate fits down inside the bowl just a little, but not imperative. Some of your veg is going to float to the top of the brine and that is okay. With a week of fermenting and salt to protect it, you won’t have any weird stuff growing other than the weird stuff we want! If you do leave sauerkraut to ferment in a cool place for longer than a week, you might see a little harmless white mold grow. The pros say to just scrape it off. Eww! I’m a little squeemish about that idea, so I prefer to get the fermenting done before any molds grow!
Another great way to submerse the bulk of your veg is to use large pieces of the veg you are fermenting as weights. So, if you are making sauerkraut, keep some of the large outer cabbage leaves to use as a protective cover under your plate. Or, if you want to weight it down, cut out the core of the cabbage and lay those on the top. Regardless, cover the veg the best you can so that it is submerged under the brine. I like to add a plastic bag over the top if the fermented veg is in a bowl as some veggies, like cabbage and radishes, can get a little pungent after a couple of days. Farm Curious gives some great budget-minded tips for other ways to ferment and protect your veg.
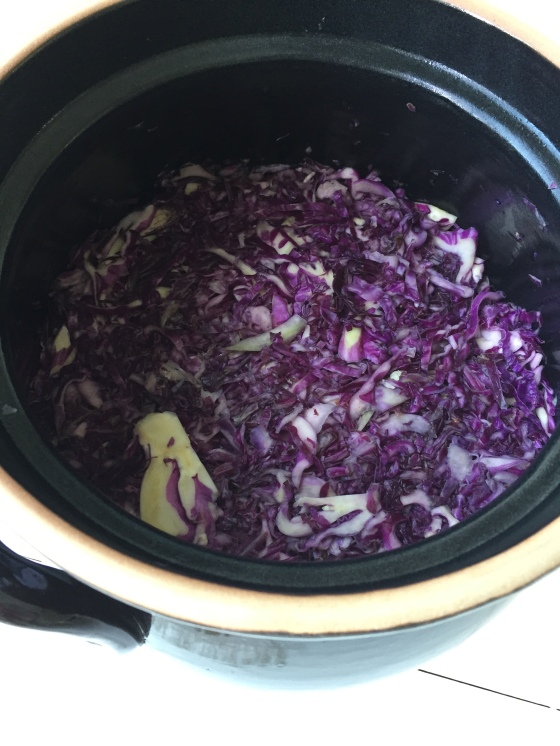
I splurged a couple years ago on a fermenting crock from Poland – it’s fat and heavy! Since owning the farm it has been great fun because it holds A LOT of veg. I can pack 25 heads of cabbage into this baby! Of course, I have trouble eating that much sauerkraut, but it is fun to make. As you can see from the red cabbage, this year’s sauerkraut is going to be PINK!


